Monday, April 27, 2015

ImageMagick integration with liferay to generate better for document(pdf,docs etc)


As i have mentioned in my previous blog about document files preview(pdf,doc etc),When we are uploading any document(image,pdf) to document
and media portlet then by default liferay using PDFBox to generate preview for image, pdf. But when we are uploading large pdf files
then liferay is not providing preview by default. For generating preview of large files we need to integrate  imageMagick with liferay as
a external service and have to enable the service in liferay application.

Below integrating imageMagick in liferay :


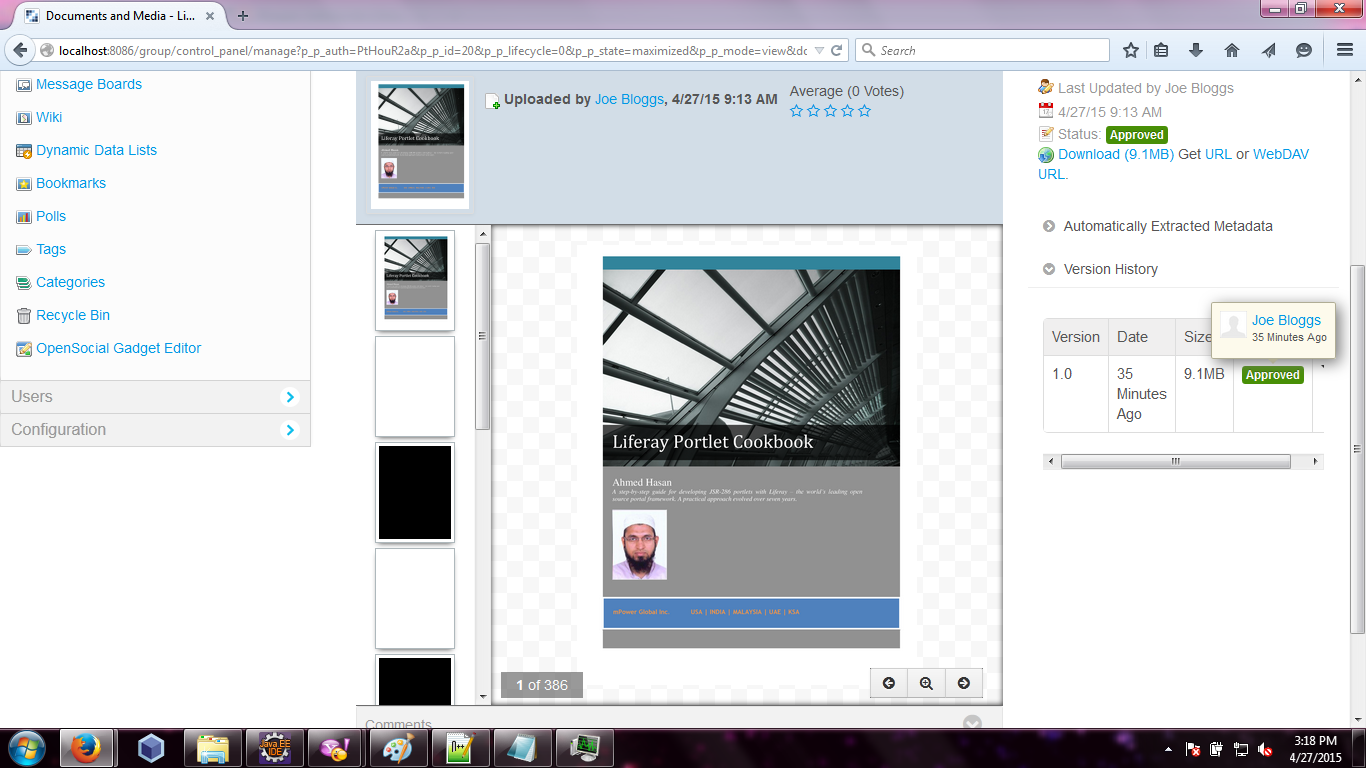
In above screen i have uploaded two pdf files, 1>small size , preview generated properly 2>large size, preview not genrated, we can't see content of pdf.


 If we not configure imageMagick with liferay and try to view
large pdf files it will show below error message.

"Liferay is not configured to use ImageMagick for generating Document Library previews and will default to PDFBox. For better quality previews,
install ImageMagick and enable"


ImageMagic Installation :

Step 1 : Download imageMagick from http://www.imagemagick.org/script/binary-releases.php#windows  and install in your system.

Step 2 : After installing imageMagic in system , now we need to enable this feature in liferay.
Login with admin credential.
Below screenshot showing how to enable.


In above screenshot i have given path of imageMagick C:\Program Files\ImageMagick-6.9.1-Q16 where i have installed in my system, in my case i have installed in C drive and checked enable option and save.

Step 3 : After completing this step we need to install ghostscript and have to configure with liferay, without this imageMagic feature will not work.
Download ghostscipt from http://ghostscript.com/download/gsdnld.html and install in your system.

After completing installation go to the same location in liferay portal where we have configure imageMagick , and in path field we need to configure ghostscript also.

In path field before imageMagick installed path  C:\Program Files\ImageMagick-6.9.1-Q16  give
 "  ; "  and set ghostScript path also. like below is the complete path.

C:\Program Files\gs\gs9.16\bin ;C:\Program Files\ImageMagick-6.9.1-Q16

Step 4 : After completing these steps restart server ,After server restarted now we can test this feature.

For testing this feature we can upload large size pdf and try to read/view generated preview.

Note: Preview generation time will depends on file size, so please keep patience after uploading file.
In my case for some files it has taken more than 10 mins to generate preview.


Sunday, April 26, 2015

lucene search in liferay on custom portlet


This Topic is all about Indexing and Searching at application level for the portal, so far we've heard about indexing at database level. Indexing at database level is a data structure that improve the speed of data retrieval operation on data base table at the cost of slower writes and less storage space. 

Indices can be created using one or more columns of a database table, providing the facility for random look up of record. But if we need to index at application level then apache lucene is a great feature to use.

Liferay by default support lucene for indexing and searching for data at application level. Apache Lucene is a high-performance, full-featured text search engine library written entirely in Java and it is open source. Any application which is require full-text search, cross-platform Apache Lucene is a great tool to use.

following steps will cover how we will search and index for custom portal data at application level.

Steps 1 : create any custom portlet and create service.xml file as we need to search custom table data through out the portal.


  Step 2 : In your liferay-portlet.xml file put this entry for new indexer class

<indexer-class>com.liferay.search.EmployeeIndexer</indexer-class>

This entry should be in pattern how its display below :


<portlet>
<portlet-name>LucenSearchProject</portlet-name>
<icon>/icon.png</icon>
<indexer-class>com.liferay.search.EmployeeIndexer</indexer-class>
<header-portlet-css>/css/main.css</header-portlet-css>
<footer-portlet-javascript>/js/main.js</footer-portlet-javascript>
<css-class-wrapper>LucenSearchProject-portlet</css-class-wrapper>
</portlet>

the above class entry in liferay-portlet.xml is the class which will help in indexing and searching of the Portlet's data. May be while you put this entry in liferay-portlet.xml file it can give error like class not found t specified path. so lets create this class at package com.liferay.search.

Step 3 : Create a class EmployeeIndexer inside package com.liferay.search. This class should extend BaseIndexer class and overwrite some of basic method as shown below. There are total of nine methods – two of them public and seven protected.


Step 3 : After  this our next step is to index our record whenever we insert any employee to our table it should be index so that the next time if we search our employee by its name or its address its should search. This kind of searching from the index is going to drastically improve the performance so for this open your Action Class or Controller class.  In my case i have added this in my controller class below is the code for this : 


below is my JSP for calling this controller


Step 4 :  Now go to your liferay portal page and from add application add liferay search tool portlet to your page. as shown below :

then go click on configuration tab of the search tool portlet you will see a screen like shown below : 


Now at end add your model class Name as i have added for my employee model in the above image .

This is it, all you have to do is now insert any record from you portlet and search it from search tool portlet you should see your record in search result as i have added a employee with name "Jhon Dane" and then search with search tool portlet, result is as shown below : 

Note : Some time it happen like after inserting record also it wont index our record and search from search tool so in that case do indexing manually, for this navigate to control panel and go for this path Control Panel>Apps>App Manager>Manage 

In Manage tab you will see all the portlet available to the portal. Navigate to the page where your portlet is available now in the action tab you should see the option for ReIndex in action tab as shown below, but in 6.2 i didn't find any option for re-indexing from portlet level so another option is go to Control Panel> Configuration >Server Administration >Resource and click execute for Reindex All Search indexes as shown below :

it will re index all the portlet available to the portal ans create document.
So This Way we can achieve the lucene search of  Liferay.


Saturday, April 25, 2015

Connecting to different Data Sources


Connecting to different Data Sources

Often we use to come across a situation as dozen of application running in any enterprises and each of them meeting some specific need of the organization. Now suddenly we may need to create a portal in which we should not disturb any of the existing legacy applications and databases they connect to. At the same time, our new portal has to fetch information from these different databases originally used by the legacy system.

connecting to different Data Source can be achieved in following steps :

Step 1: put the below code either in portal “portal-setup-wizard.properties” or “portal-ext.properties” under PORTAL_HOME and restart the server.


the above entries is use for another data base.
NOTE : you can connect to any kind of data base like sql server, mysql etc. All you have to do is provide the data base configuration in the above mentioned file.

Step 2 : In your portlet create a new file “ext-spring.xml” inside “WEB- INF/src/META-INF” and paste the below contents.


Step 3 : Define a new entity in Service.xml which will mapped to another data base but not the default one.


In the above entity there is some new attribute data-source and session-factory are mandatory. These are the attributes which will look for ext-spring.xml file and fetch the configuration for connecting another data base. Save file and re-generate service layer.

Step 4: Unlike the entities that are mapped to the default data-source, the table for this
entity will not be created automatically. We need to create it manually as i have use mysql data base so accordingly i am writing query here.

CREATE TABLE `anotherdatabase`.`temporaryemployee` (
  `employeeId` INTEGER UNSIGNED NOT NULL AUTO_INCREMENT,
  `employeeName` VARCHAR(45) NOT NULL DEFAULT '',
  `employeeAddress` VARCHAR(45) NOT NULL DEFAULT '',
  PRIMARY KEY(`employeeId`)
)
ENGINE = InnoDB;


Step 5 : Now create an action class as below : 


Step 6 : And jsp should be as follows:


now after building services and deploying portlet try to save a record.
check in your newly create table that record has inserted successfully.

In the same way you can fetch record from already created Table  all you have to do is create entity and give attribute table with same name for the table of which data you want to fetch.This way you can write application code to fetch data from another Data Base table.


Xuggler integration with liferay to generate preview of media document

When we are uploading any document(image,pdf) to document and media portlet then
by default using PDFBox liferay to generate preview for image, pdf. But when we are uploading any audio,video files, liferay by default not generating
preview and we can't play that audio or video file. To enable preview of audio and
video file ,we need to integrate xuggler and we have to enable xuggler in liferay.
In above screenshot we can see that we have uploaded three files, 1.Pdf (preview
generated by default, we can see pdf content) 2. Image (preview generated by
default)
3.Video file(preview not generated, we can't see/play video)
For generating preview and playing video, we need to integrate xuggler with liferay.
How to install and enable xuggler in liferay :
 
we have to select xuggler version as per our system environment. In screeshot as i have selected for 32 bit operating system.
After xuggler installation completion , restart server.
after restarting enable xuggler in liferay, as shown in screenshot below.

xuggler is installed and integrated with liferay, now we can upload , view/play audio and video files in liferay.
as shown in below screenshot.

Enjoy xuggler feature with liferay!!!


Integrate openOffice with liferay for document/content format conversion


Test Environment :(You can test in other environment also)
  OpenOffice 4.0.0.1
  Liferay 6.2 CE
  Tomcat 7
  Window 7

Assume we have uploaded one word document into document & Library portlet or we have created one web content and written some contents in
html format. But we want to download the document or web content as pdf.
 
Liferay has given this fetaure to convert document in different formats like pdf, doc…etc. We can convert web contents and document & media
contents in different formats. But this feature is not enabled by default. To enable this feature we need to integrate openOffice with liferay.
Here in this scenerio openoffice integration comes into the
picture.


Step 1: Download openOffice from mention link or any other link  http://www.openoffice.us.com/download-openoffice-free.php

Step 2: Install openOffice
In between installation of open office one pop up of super optimizer can come, just close that pop up.
and let open office installation completing properly.
Below screenshot of super optimizer.


Step 3: Start OpenOffice service
    I> navigate to the C:\Program Files\OpenOffice.org 3\program (Note:C:\Program Files\OpenOffice.org 3 , installed openoffice location in my
    case)


    II> execute the following command in command prompt
        soffice -headless -accept="socket,host=127.0.0.1,port=8100;urp;" -nofirststartwizard

       
Step 4: After installing openOffice and starting openOffice service , enable openOffice from liferay control panel side. follow below
screenshot to enable openOffice.


Integration is done.


Now for testing,
I . will create one web content and will convert web content to pdf.
--------------------------------------------------------------------------------
Below are the steps shown in screenshot to create web content and pdf conversion.


II. Will upload one doc file with extension .doc and will convert that to pdf, below are the screenshot of uploading and conversion.

Login with admin account and proceed further.


Open social gadget integration with liferay


 What we are going to do in this section of blog?


 We will integrate external gadgets in liferay, first we create gadget by providing the url of gadget, after that we will place
 that gadget on liferay portal page, then we can configure that gadgets like we are configuring our liferay portlets.

 Integrate using control panel

 --------------------------------------

 Step 1 : Login with administration account in your liferay portal , go to control panel and in Apps section click on Open Social Gadget
publisher.


Step 2 : Click on Publish gadget , in publish gadget view provide gadget url  http://www.labpixies.com/campaigns/cinco/cinco.xml  and
check category, in which category you wants to display published gadgets and then click Save.


Step 3 : After completing this step now you will able to see the list of gadgets which you have added, following same process you can add more
gadgets.


Step 4 : Now to go portal page and then add option , and then go to application section and then expand Gadgets section , now you will able
to see the list of gadgets which you have added in Gadgets category section. Below are the screenshots.


Step 5 : Now add listed gadgets on you portal page and use.

Integrate using open social gadget portlet

-----------------------------------------------------

Step 1 : Login with administration account and click on add section and then click on application and then expand Gadgets section
and add open social gadget portle to portal page and shown below in screenshot.


Step 2 : Click on configuration icon of open social gadget portlet as shown below in screenshot.


Step 3 : In popup provide gadget url   http://www.labpixies.com/campaigns/cinco/cinco.xml  and save , now you will able to see your configured gadget.

Output:


Note : In this blog, we have used an external URL of gadget. we can download an XML file and store it on the local server and provide that
URL. Either we can put the XML file on the web server, or we can upload to Document Library as a document and reference it by URL.